Preparing samples for scanning electron microscope imaging
Blog post by Clodagh Dooley
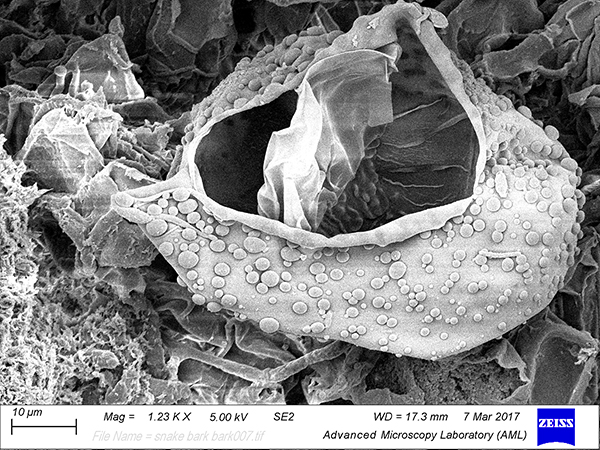
Scanning electron microscopes (SEM) are amazing tools that allow imaging far beyond the resolution capabilities of light microscopes. SEMs work by creating a focused beam of electrons that scans over a sample; interacting with and exciting its atoms and generating signals that can be used to derive an image of the samples topography.

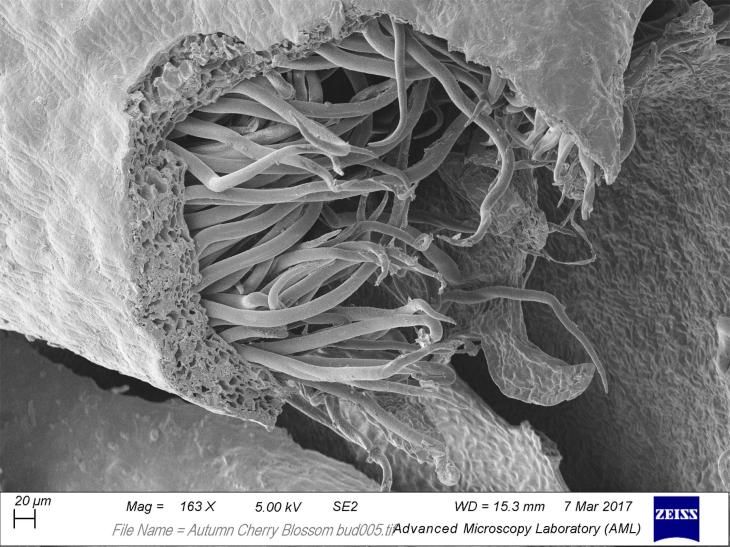
Fig. 1.Sage leaf surface hairs. Images by Dr. Clodagh Dooley, AML, CRANN, TCD.

Fig. 2. The scanning electron microscope used to image the Trinity Tree samples. The tool is based in The Advanced Microscopy Lab, CRANN, TCD. The microscope is a Zeiss Ultra FESEM with Gemini column and Quorum Cryo preparation chamber.
To avoid scattering of the electron beam, the electron source and the sample chamber are under vacuum. This causes no issue when working with a dry sample, such as a metal or ceramic, but can cause big problems when working with a sample with a high water content. Samples with a high water content, such as plant material, use the water as support for its structure, if this water is removed rapidly, as will happen when placed in a vacuum, then the sample will dehydrate and collapse.

Fig. 3. The vacuum chamber of the SEM showing the loading stage.
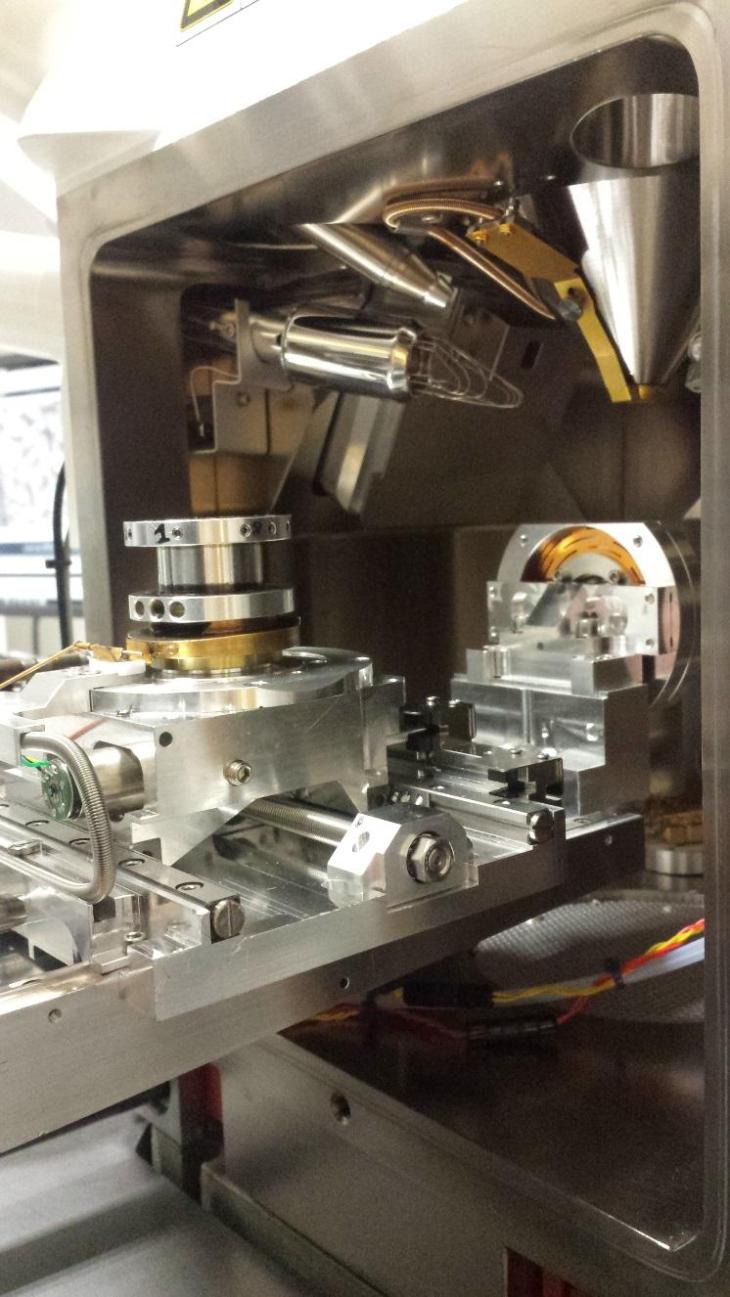
Fig. 4. The vacuum chamber of the SEM showing the loading stage.
The first step in preparing a biological sample for SEM is to preserve it using glutaraldehyde, a chemical fixative that prevents any breakdown and degradation of the structure. The next step is to deal with the water. This is usually done in one of two ways; removing the water in a slow, controlled manner with help of solvents or solidifying the water as ice and imaging a frozen sample.
In the first method the water in the sample is slowly replaced with alcohol by immersing it in deionised water/alcohol solutions with increasing alcohol concentration until it is in a 100% alcohol solution. The alcohol immersed sample is placed in the critical point dryer (CPD) chamber and the alcohol solution is very slowly replaced with liquid CO2. Once the alcohol within the chamber has been completely replaced with liquid CO2 the system is brought to what is termed as the ‘critical point’ for CO2. This is where the pressure and temperature within the CPD chamber causes the liquid CO2 in the sample to turn from a liquid to a gas. The gas can then be vented off without any distortion of the sample due to surface tension.

Fig. 5. The Quorum Critical Point Dryer
The second method involves the use of liquid Nitrogen. The sample is plunged into liquid Nitrogen slush (-190°C) to flash freeze. It is then transferred, under vacuum, to a cold stage within the SEM imaging chamber where it is held at this temperatures throughout imaging. With this method of preparation, chemical fixation can be avoided as the flash freezing preserves the sample structure and prevents degradation.

Fig. 6. Cryo preparation chamber on the side of SEM chamber.
The final step before we can image a biological/hydrated sample is to coat it with an electron conductive coating; commonly used coating materials include carbon, gold, palladium and platinum. Conductive coating prevents charging of the specimen, which is caused by accumulation of static electric fields and makes imaging difficult.

Fig. 7. Cressington 208 Turbo sample coater.

Fig. 8. Plant material coated in a 10nm layer of Gold Palladium.